One of the great things about Articulate 360? It’s very easy to add audio content to your courses. Whether you’re using Rise 360 online or one of Articulate’s suite of desktop applications, you can add audio to any of your courses.
In this series, we’ll show you the steps to take to get your WellSaid audio files integrated with your course. This post is all about Rise 360.
Integrating WellSaid Audio with your Rise 360 Course
Log in to your Rise 360 account and open up your module.
Identify which section needs audio and click “EDIT CONTENT” next to that section. (Note: if you haven’t yet added content, you’ll click “ADD CONTENT” instead).
Navigate to the part of your lesson where your audio clip will be located. Click the “All Blocks” box on your navigation pane.
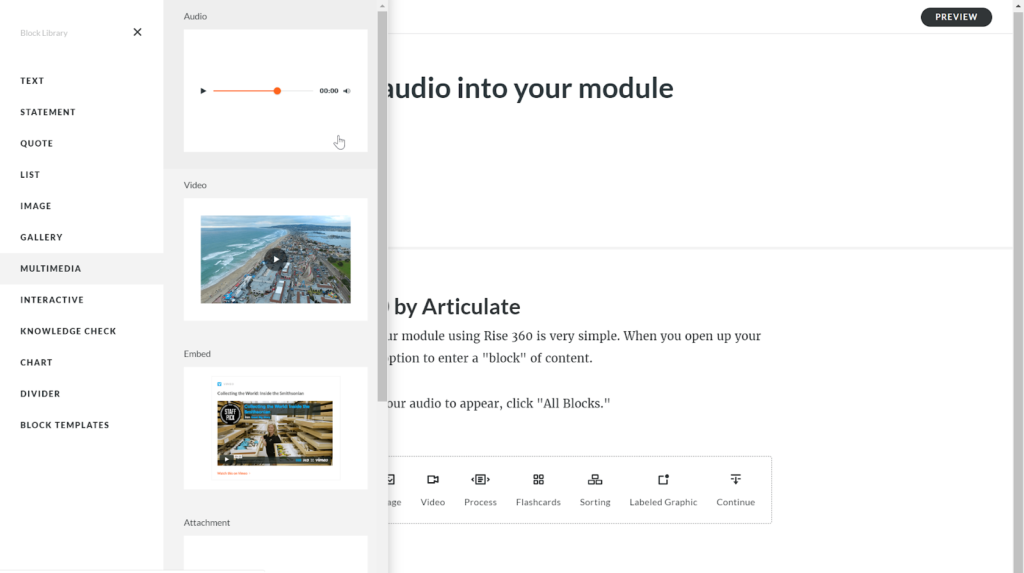
A menu will open up on the left-hand side of your screen. Click “MULTIMEDIA.” A second menu will appear to the right. Click “Audio.”

Dismiss the menus.
Hover your mouse over the audio clip, and an “Edit” button will appear on the left-hand side. Click “Edit.”
In the menu that opens on the left side, click the “UPLOAD” button.
In the dialog box that opens, find the file you wish to upload. Click on the file name, then click “Open.”
You’ve now successfully imported your WellSaid files into Rise 360!

